 English
 简体中文
简体中文 Chinese
 English


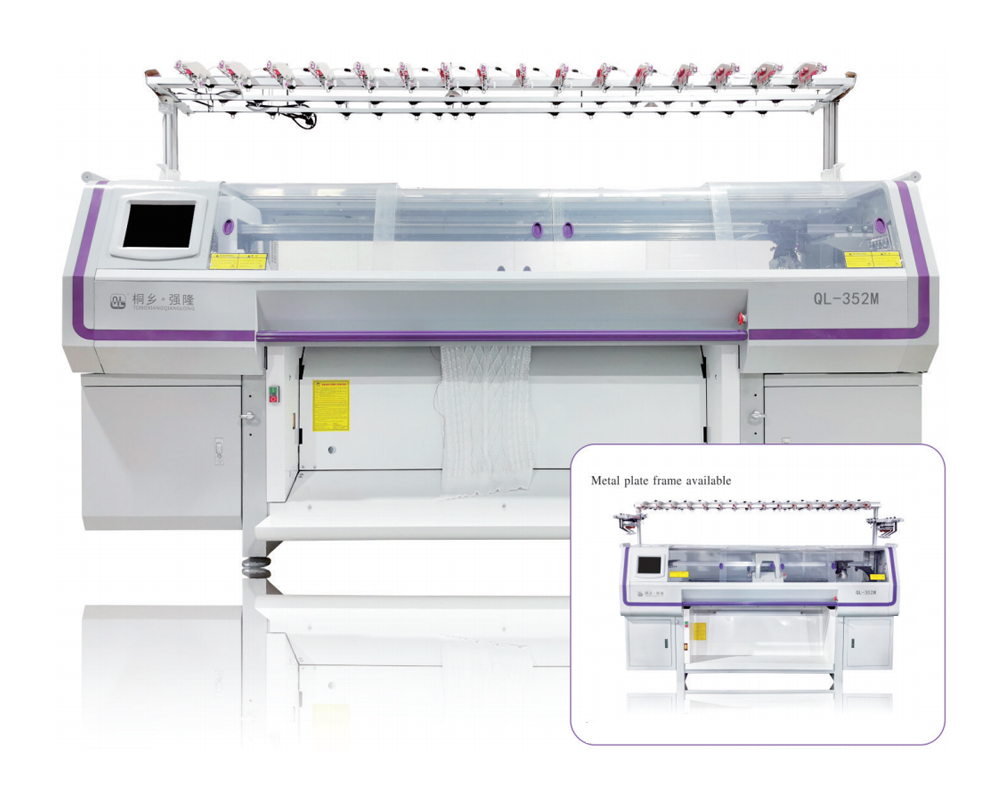
Tongxiang Qianglong Machinery Co., Ltd. is high-tech China wholesale computerized flat knitting machine manufacturers, specialized in designing, developing, and manufacturing Knitting Machinery..
Content
- 1 The Role of Computerized Flat Knitting Machines in Modern Textile Production
- 2 Machine Configuration: Gauge, Bed Width, and Yarn System
- 3 Programming and Design File Preparation
- 4 Startup Sequence and Cast-On Procedures
- 5 Industrial Uses Across Product Categories
- 6 Tension Management: The Most Critical Operational Variable
- 7 Routine Maintenance for Sustained Machine Performance
The Role of Computerized Flat Knitting Machines in Modern Textile Production
Computerized flat knitting machines have fundamentally changed how knitwear is designed, sampled, and manufactured at scale. By replacing the manual cam-setting and mechanical needle selection of traditional flat knitting machines with digitally controlled systems, these machines allow a single operator to produce complex stitch structures, shaped garment panels, and multi-yarn colorwork with consistent accuracy across every production run. The shift from mechanical to computerized control also dramatically shortens the time between design concept and finished sample, since pattern changes that once required hours of physical reconfiguration can now be uploaded and executed within minutes through dedicated design software.
Understanding how to operate a computerized flat knitting machine effectively requires more than familiarity with its buttons and interface. It demands a working knowledge of knitting mechanics, yarn behavior, fabric structure, and digital programming — all of which interact directly during production. This guide covers the practical operation essentials and the primary industrial uses that define where and why these machines are deployed.
Machine Configuration: Gauge, Bed Width, and Yarn System
Before any knitting begins, a machine must be configured correctly for the intended product. Three parameters define that configuration most directly: gauge, bed width, and the yarn feeding system in use.
Gauge refers to the number of needles per inch across the needle bed. It determines which yarn counts can be knitted without structural faults and what fabric density is achievable. A 3-gauge machine uses thick needles spaced widely apart and works with heavy chunky yarns, producing open, coarse fabric typical of bulky winter knitwear. A 12- or 14-gauge machine has fine, closely spaced needles that can handle lightweight yarns measured in high Nm counts, producing smooth, dense fabric suitable for fine gauge sweaters or technical textiles. Selecting the wrong yarn for a machine's gauge causes needle breakage, dropped stitches, and uneven tension that no software adjustment can fully correct.
Bed width determines the maximum fabric width the machine can produce. Standard industrial machines range from 50 inches to over 80 inches of needle bed width. Wider beds are used for large blankets, wide panel sections, or whole-garment production where multiple pieces need to knit simultaneously side by side on the same bed. Narrower beds are suited to accessories, sleeves, or collar components. The yarn feeding system — including the creel that holds yarn cones, the tensioning guides, and the yarn carriers mounted on the carriage rail — must be set up with clean, unobstructed yarn paths before production begins, as any resistance in the path directly affects stitch consistency.
Programming and Design File Preparation
The computerized control system of a flat knitting machine receives its instructions from a design program created on a dedicated software platform. Each major manufacturer supplies its own: Shima Seiki uses SDS-ONE APEX, Stoll uses M1 Plus, and Brother industrial machines use their proprietary knitting design system. These platforms function as both graphic design tools and technical knitting compilers — they translate a visual pattern into machine-executable instructions that specify needle selection, yarn carrier movement, carriage direction, tension settings, and shaping sequences row by row.
When preparing a design file for production, the operator or technician must define several parameters precisely. Stitch structure assignments determine which areas of the panel knit in jersey, rib, interlock, or purl. Yarn carrier assignments map each color or yarn type to a specific carrier number so the machine calls the right yarn at the right moment. Tension values are set by zone, since a ribbed hem, a cable body, and a bound-off edge each require different tension to produce the correct loop size. Shaping instructions — increases and decreases executed by transferring stitches between needle beds or moving active needle zones inward and outward — are programmed as row-specific events that the machine executes automatically at the designated points in the panel.
Startup Sequence and Cast-On Procedures
Starting a production run on a computerized flat knitting machine follows a defined sequence that minimizes errors and protects both the machine and the yarn. Rushing the startup process is one of the most common causes of early-production faults in knitting facilities.
- System initialization: Power up the machine and allow the control system to complete its self-diagnostic cycle. Most machines run an automatic check of needle selection electronics, carriage position sensors, and yarn break detectors before accepting a design file.
- Design file upload: Transfer the prepared knitting program from the design workstation to the machine via USB, network connection, or direct cable depending on the model. Confirm the file loaded correctly by reviewing the on-screen stitch simulation.
- Yarn threading: Thread each yarn from its cone through the creel tensioners, across the machine frame guides, and into the designated yarn carrier. Pull enough yarn slack through each carrier to allow clean feeding at carriage startup without the yarn snapping taut on the first pass.
- Cast-on execution: Begin with the cast-on sequence as programmed — either a racking cast-on using the machine's own needles or a waste yarn section that will be removed after finishing. The cast-on must engage all active needles evenly to establish consistent fabric foundation.
- First-rows inspection: After the first 10 to 15 rows of the main yarn, stop the machine and inspect the forming fabric for dropped stitches, uneven tension, or incorrect stitch structure before allowing the full program to run unattended.
Industrial Uses Across Product Categories
Computerized flat knitting machines are deployed across a wider range of product categories than is commonly recognized outside the textile industry. Their ability to produce shaped, structured, and multi-material fabric in a single automated process makes them relevant well beyond fashion knitwear.
| Industry Sector | Products Made | Machine Capability Required |
| Fashion & Apparel | Sweaters, cardigans, dresses, coats | Full fashioning, intarsia, multi-carrier |
| Sportswear & Footwear | Shoe uppers, compression sleeves, base layers | Mixed stitch zones, inlaid yarn, gradient tension |
| Medical Textiles | Orthotic braces, compression garments, prosthetic liners | 3D shaping, multi-layer structures, technical yarns |
| Home Textiles | Throws, cushion covers, decorative panels | Wide bed, jacquard programming, bulky gauge |
| Technical & Industrial | Composite preforms, filtration fabric, geotextile components | Inlay capability, high-strength yarn handling |
In the sportswear and footwear segment, computerized flat knitting has become especially significant since the introduction of knitted athletic shoe uppers. These uppers require different stitch densities across different zones of the same piece — open, breathable mesh at the toe box, dense reinforced fabric at the heel counter, and stretch zones along the sides — all produced in a single automated knitting operation without cutting or stitching separate fabric pieces together. This approach reduces material waste significantly compared to cut-and-sew construction and allows for precise engineered performance properties in each zone.
Tension Management: The Most Critical Operational Variable
Of all the variables an operator manages during production, yarn tension has the greatest impact on fabric quality and the most potential to cause cascading faults when set incorrectly. Tension on a flat knitting machine is controlled at two levels: the yarn supply tension, regulated by the creel tensioners and guide path friction, and the stitch cam tension, which determines how far each needle descends to draw a loop of specific size.
On computerized machines, stitch tension values are set numerically in the design program and can vary row by row and zone by zone within the same panel. A lower tension number produces a larger, looser stitch; a higher number produces a tighter, smaller stitch. Getting these values right requires test knitting and measurement against a target gauge swatch. For each new yarn or stitch structure, the operator should run a gauge sample, measure the stitch and row count against the design specification, and adjust tension values in the program accordingly before committing to a full production run. Even small deviations of one or two stitches per 10 cm across the gauge swatch will compound into significant dimensional errors across a full-size garment panel.
Routine Maintenance for Sustained Machine Performance
A computerized flat knitting machine operating in continuous production accumulates fiber debris, oil residue, and mechanical wear at a rate that makes scheduled maintenance non-negotiable. Maintenance intervals should be defined by the manufacturer's service manual and followed consistently rather than reactively.
- Daily cleaning: Use compressed air and a soft brush to clear lint and fiber debris from the needle beds, carriage tracks, and cam systems at the end of each production shift. Accumulated fiber is the leading cause of needle damage and carriage blockages.
- Needle inspection: Visually check needles across the bed at regular intervals for bent hooks, damaged latches, or cracked shanks. A single faulty needle left in place will produce a recurring fault column in every panel it participates in forming.
- Lubrication: Apply manufacturer-specified machine oil to carriage rails and cam components on the schedule defined in the service manual. Under-lubrication causes metal wear; over-lubrication causes yarn and fabric contamination.
- Software and firmware updates: Keep the machine's control system software current with manufacturer-released updates, which often include improvements to needle selection accuracy, fault detection sensitivity, and design file compatibility.
- Periodic full service: Schedule a comprehensive inspection by a certified technician at the manufacturer-recommended interval — typically every 6 to 12 months of continuous production — covering the electronic selector system, cam timing, take-down roller calibration, and control board diagnostics.
